7 DIY Tips to Turn Your Home into a “Smart Home”

Turning your home into a smart home? Having a smart home can be convenient for families.  With a couple of changes from your indoor, built-in gadgets, and appliances, you could make your home more modern. Moreover, improving your home and turning it into a smart home can also increase its value.

Thanks to our friends and favorite Gilbert Painters for these Smart Home tips.

Make Your Smart home center Using Raspberry Pi for Your DIY Smart House

One of the basic pieces of a savvy home is a shrewd home center point. This center point will permit you to incorporate all your savvy gadgets from various classes and makers and makes it conceivable to control them from a distance. Moreover, the brilliant home center permits these shrewd gadgets to team up. Subsequently, you can fill different roles involving various savvy gadgets in your brilliant home simultaneously.

Convert Your Old Webcam into a Smart Security Camera

Brilliant surveillance cameras offer extraordinary comfort. You can screen what’s going on in your home, in any event, when you are away, through your cell phone. In any case, introducing a savvy surveillance camera framework is pricey.

Make Your Smart Button

Brilliant buttons offer extraordinary comfort, contingent upon the circumstance. Consider them an alternate route to fill specific roles in your shrewd home. The functioning guideline of these buttons is basic. At the point when you press them, it sets off a sign that is sent by means of Bluetooth to a shrewd gadget. This sign orders the gadget to play out a predefined work.

Drywall Disasters? Not Anymore: Expert Patching Tips

Drywall disasters can strike any homeowner or renter at any time, leaving unsightly blemishes on walls and ceilings. Whether it’s from accidental damage, wear and tear, or even just the passage of time, dealing with these imperfections can be a daunting task. However, fear not! With the right knowledge and techniques, you can easily tackle these drywall woes and restore your walls to their former glory. In this comprehensive guide, we’ll delve deeper into expert patching tips to help you overcome drywall disasters like a seasoned professional.

Understanding the Damage

Before diving into the patching process, it’s crucial to assess the extent of the damage. Is it a small hole, a larger crack, or perhaps a dent or gouge? Understanding the nature of the damage will dictate the appropriate repair method and materials needed. Take your time to inspect the affected area thoroughly, noting any irregularities or underlying issues that may need addressing.

Gather Your Materials

Once you’ve identified the type and size of the damage, gather the necessary materials for the repair job. This typically includes:

  • Drywall patch: Depending on the size of the damage, you may need a small patch or joint compound.
  • Joint compound: Also known as drywall mud, this is used to fill in gaps and smooth out patches.
  • Putty knife: Essential for applying joint compound and smoothing out surfaces.
  • Sandpaper: For sanding down rough edges and achieving a smooth finish.
  • Primer and paint: To match the repaired area with the rest of the wall.

Additionally, consider investing in a utility knife, drywall saw, drywall screws, adhesive mesh tape, and a texture spray if you have textured walls.

Patching Small Holes

For small holes, such as those left behind by nails or screws, follow these step-by-step instructions:

  1. Prepare the Area: Clean the area around the hole to remove any dust or debris. This will ensure better adhesion for the patching material and a smoother finish.
  2. Apply the Patch: Using a putty knife, fill the hole with joint compound, ensuring it’s slightly overfilled to account for shrinkage as it dries.
  3. Smooth It Out: Once the compound is dry, typically within 24 hours, sand down the excess until it’s flush with the wall surface. Use fine-grit sandpaper for a smooth finish.
  4. Prime and Paint: Apply a coat of primer to the patched area to seal the surface and ensure uniform paint absorption. Once the primer is dry, apply paint to match the surrounding wall, blending the patched area seamlessly.

Repairing Larger Damage

For larger holes or cracks, a slightly different approach is needed to achieve a durable and long-lasting repair:

  1. Cut Out the Damage: Use a utility knife to carefully cut away any damaged or loose pieces of drywall, creating a clean, even edge around the perimeter of the hole.
  2. Fit the Patch: Measure and cut a piece of drywall to fit the hole, ensuring it’s slightly smaller than the opening to allow room for joint compound.
  3. Secure the Patch: Use drywall screws to attach the patch to the surrounding wall studs, ensuring a secure and stable foundation for the repair. Alternatively, apply adhesive mesh tape around the edges of the patch for added reinforcement.
  4. Apply Joint Compound: Spread joint compound over the seams and edges of the patch, using a putty knife to feather it out and blend with the surrounding wall. Apply multiple thin coats, allowing each layer to dry completely before sanding.
  5. Sand and Smooth: Once the joint compound is dry, sand the patched area using fine-grit sandpaper until smooth and flush with the wall surface. Be sure to remove any dust or debris before proceeding to the next step.
  6. Finish with Primer and Paint: Apply a coat of primer to the patched area to seal the surface and promote adhesion. Once the primer is dry, apply paint to match the surrounding wall, ensuring a seamless transition between the patched area and the rest of the wall.

Dealing with Textured Walls

If your walls have a textured finish, matching the texture can be a bit trickier but achievable with patience and practice:

  1. Match the Texture: Experiment with different techniques and tools to replicate the texture of the surrounding wall. This could involve using a texture spray, sponge, specialized texture roller, or even a homemade texture mix.
  2. Test First: Before applying the texture to the patched area, practice on a spare piece of drywall or inconspicuous area to ensure a close match in both texture and consistency.
  3. Apply Carefully: Once you’re confident in your technique, apply the texture to the patched area, feathering it out to blend seamlessly with the rest of the wall. Use light, even strokes to achieve the desired texture pattern.

Prevention Tips:

While knowing how to patch drywall is essential, preventing damage in the first place is even better. Here are some proactive measures you can take to minimize the risk of future drywall disasters:

  • Use wall anchors: When hanging heavy objects such as shelves or artwork, use wall anchors to distribute the weight evenly and prevent damage to the drywall.
  • Handle with care: Be mindful of furniture, appliances, and other objects that could potentially damage the walls, and take precautions to avoid collisions or impacts.
  • Regular maintenance: Inspect your walls regularly for signs of damage or wear and tear, and address any issues promptly before they worsen. This includes repairing small cracks or holes before they have a chance to expand.

Conclusion

Drywall disasters may seem daunting, but armed with the right knowledge, tools, and techniques, you can tackle them with confidence. Whether it’s a minor blemish or a substantial repair job, understanding how to assess, prepare, and execute the patching process is key to achieving professional-looking results. By following these expert patching tips and implementing preventive measures, you can keep your walls looking pristine and maintain the integrity of your living space for years to come. Say goodbye to drywall disasters – with these comprehensive guidelines, you’ve got everything you need to restore your walls to their former glory!

Green Living: Sustainable Practices for a Greener Home

In today’s rapidly changing world, the concept of green living and sustainable practices has become more critical than ever. As environmental concerns continue to escalate, individuals are seeking ways to reduce their carbon footprint and make a positive impact on the planet. One area where we can significantly contribute to sustainability is within the confines of our own homes. By adopting sustainable practices and incorporating green living principles, we can create a greener home that benefits both the environment and our overall well-being.

One of the fundamental aspects of green living is energy conservation. In a greener home, energy-efficient appliances and lighting play a vital role. Replacing traditional incandescent bulbs with LED or CFL lights can save a significant amount of electricity while lasting much longer. Additionally, investing in energy-efficient appliances, such as refrigerators, washing machines, and air conditioners, can lead to reduced energy consumption and lower utility bills.

Renewable energy sources are another crucial aspect of green living. Installing solar panels on rooftops can harness the power of the sun and convert it into clean, renewable electricity. This not only helps reduce dependence on fossil fuels but also lowers the home’s overall carbon emissions. Many governments offer incentives and tax credits to encourage the adoption of renewable energy, making it a financially feasible option for homeowners.

Water conservation is equally important in a greener home. Implementing simple practices like fixing leaks, installing low-flow faucets and showerheads, and collecting rainwater for gardening can significantly reduce water wastage. Greywater systems can also be set up to recycle water from showers and sinks for non-potable purposes, further reducing water consumption.

A greener home is also characterized by sustainable materials and construction techniques. When renovating or building, opting for eco-friendly materials like bamboo flooring, reclaimed wood, or recycled glass not only reduces the demand for new resources but also minimizes harmful emissions. Additionally, proper insulation and energy-efficient windows can enhance the home’s thermal efficiency, reducing heating and cooling needs.

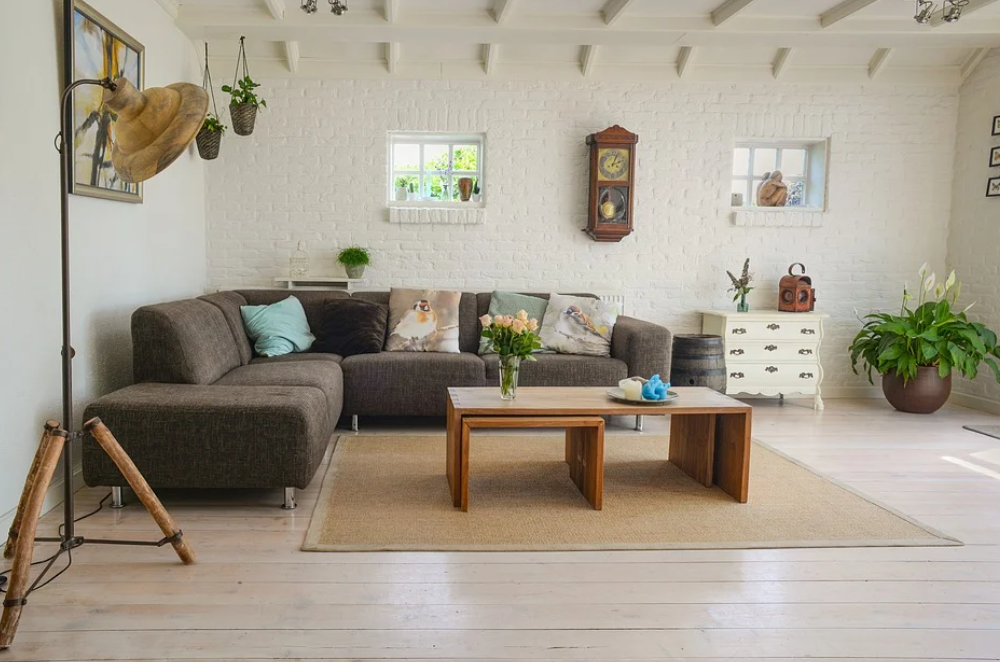
Integrating nature into living spaces is a hallmark of green living. Indoor plants not only improve air quality by absorbing carbon dioxide and releasing oxygen but also provide a sense of tranquility and connection with nature. Creating a small garden or green space at home allows residents to grow their own organic produce, promoting a healthier lifestyle and reducing the environmental impact of food transportation.

Waste reduction and recycling are crucial components of a greener home. Implementing a composting system for kitchen scraps and yard waste reduces the amount of organic matter sent to landfills while creating nutrient-rich soil for the garden. Proper waste segregation and recycling ensure that materials like paper, glass, plastics, and metals are reused, reducing the demand for new raw materials and minimizing pollution.

Adopting a minimalist approach to consumption also aligns with green living principles. Choosing quality over quantity and purchasing items made from sustainable materials can help minimize waste and reduce the environmental impact of production and transportation. Embracing second-hand shopping and upcycling old items can also add a unique touch to home decor while reducing the demand for new goods.

Lastly, a greener home promotes eco-friendly transportation options. Encouraging cycling, walking, or using public transportation reduces reliance on personal vehicles and decreases greenhouse gas emissions. Installing electric vehicle charging stations at home can further incentivize the transition to sustainable transportation.

In conclusion, green living and sustainable practices for a greener home are vital steps we can take to protect the environment and ensure a better future for generations to come. By implementing energy conservation, utilizing renewable energy sources, practicing water conservation, using sustainable materials, integrating nature, reducing waste, and adopting eco-friendly transportation options, we can collectively make a significant difference. The choices we make within the confines of our homes can positively impact the world outside, inspiring others to follow suit and creating a ripple effect of positive change for a greener and more sustainable planet.…

Easy Drywall Tricks to Fix Any Mistake

Drywall installation and repair can be made easier with a few handy tricks. Here are some easy drywall tricks to help you achieve better results:

  1. Cutting Outlets and Switches: When cutting openings for electrical outlets or switches, it can be challenging to get precise measurements. Instead of measuring and marking directly on the drywall, use the outlet or switch itself as a template. Place the outlet or switch on the drywall where it will be installed, trace around it with a pencil, and then cut along the traced lines.
  2. Preventing Drywall Nail Pops: Nail pops occur when the drywall nails or screws push through the surface, creating a noticeable bump. To prevent this, use a screw instead of nails to secure the drywall to the studs. Screws provide better holding power and are less likely to cause nail pops. Drive the screws just below the surface of the drywall without breaking the paper, and then cover them with joint compound.
  3. Using a Drywall Lift: Installing drywall on ceilings can be physically demanding and challenging to hold in place. A drywall lift is a helpful tool that holds the drywall sheets in position while you secure them. It eliminates the need for additional help and makes the installation process much easier. You can rent a drywall lift from a local equipment rental store.
  4. Feathering Joint Compound: When applying joint compound, it’s important to feather the edges to achieve a smooth finish. To make feathering easier, use a wider putty knife or taping knife. Start with a thicker layer of joint compound near the joint or seam and gradually taper it out as you move away. Feathering helps blend the compound seamlessly with the surrounding drywall, minimizing the need for excessive sanding.
  5. Drywall Repair with a Mesh Patch: For small drywall repairs, such as holes or cracks, a mesh patch can be a quick and effective solution. Cut a piece of self-adhesive mesh patch slightly larger than the damaged area. Apply it over the hole or crack, pressing firmly to ensure good adhesion. Then, apply joint compound over the mesh patch, feathering the edges. Once dry, sand and finish as needed.
  6. Using a Damp Sponge for Sanding: Sanding drywall creates dust that can be messy and time-consuming to clean up. To minimize dust, try using a damp sponge instead of sandpaper for small touch-ups or smoothing out joint compound. Wet the sponge slightly and gently rub it over the drywall surface in a circular motion. The dampness helps smooth out imperfections without creating excessive dust.

Remember, practice makes perfect when it comes to drywall work. Don’t be discouraged if you don’t achieve flawless results immediately. With these easy drywall tricks and a bit of patience, you’ll improve your skills and achieve better finishes over time.

.

Tips for Installing Cabinet Crowns for Beginners

Happy couple at home thinking about the decoration of their house using an app on a tablet – DIY concepts

Installing cabinet crown molding can add a touch of elegance and sophistication to your kitchen or bathroom cabinets. While it may seem like a daunting task for beginners, with the right tools and steps, you can achieve a professional-looking installation. Here’s a beginner-friendly guide to installing cabinet crown molding:

  1. Gather the necessary tools and materials: You will need crown molding, measuring tape, a miter saw, coping saw, nail gun or hammer and finishing nails, construction adhesive, a level, caulk, sandpaper, and paint or stain (if desired).
  2. Measure and cut the molding: Measure the length of the cabinet’s top surface. Cut the crown molding to fit using a miter saw. For inside corners, cut the molding at a 45-degree angle. For outside corners, cut the molding to the desired angle (typically 90 degrees).
  3. Test fit the molding: Place the cut pieces of crown molding along the top of the cabinets to ensure they fit correctly. Make any necessary adjustments by trimming or recutting the molding.
  4. Install the mounting blocks: To provide a secure base for the crown molding, install wooden mounting blocks on the top of the cabinets. Cut the blocks to the appropriate size and attach them to the cabinet tops using construction adhesive and finishing nails.
  5. Apply adhesive and secure the molding: Apply construction adhesive to the back of the crown molding pieces. Carefully position the molding on top of the cabinets, pressing it firmly against the mounting blocks. Use a level to ensure the molding is straight and level. Secure the molding in place with finishing nails or a nail gun, placing nails through the molding and into the mounting blocks.
  6. Install inside corners: For inside corners, use a coping saw to cut along the profile of the molding where it meets the adjacent piece. This technique helps create a clean and seamless joint. Fit the coped end into the previously installed piece of molding and secure it with nails or adhesive.
  7. Install outside corners: For outside corners, cut the molding at the appropriate angle using a miter saw. Ensure the angles are accurate and fit the molding pieces together tightly. Secure them in place with nails or adhesive.
  8. Fill gaps and sand: Fill any gaps or nail holes with wood filler or caulk. Once the filler is dry, sand the molding and the filled areas to create a smooth and even surface.
  9. Paint or stain: If desired, paint or stain the crown molding to match the cabinets or the overall design of the room. Apply multiple coats, allowing each coat to dry before proceeding to the next.
  10. Apply a final touch: Use caulk to fill any remaining gaps between the molding and the cabinets or walls. Smooth out the caulk with a caulk finishing tool or a damp cloth.

Remember to take your time, measure accurately, and practice proper safety precautions while using tools. If you feel unsure about any step, consult a professional or seek guidance from experienced individuals. With patience and attention to detail, you can successfully install cabinet crown molding and enhance the aesthetic appeal of your cabinets.

.

Home Painting Tips for Beginners

1. Stay away from Roller Lap Marks

While utilizing a roller to paint an enormous divider, on the off chance that you don’t do it right you’ll wind up with lap marks where you paint over a piece of the divider you recently painted. To stay away from them, ensure you cross-over the spots you painted beforehand before the paint has dried.

2. Keep Can-To-Can Paint Color Consistent

Regardless of whether they were blended simultaneously utilizing a similar shading equation, paint tones can change starting with one can then onto the next. To keep the shading steady, pour all the paint you’ll require for the gig into a solitary holder (a five-gallon pail normally gets the job done) and blend them completely.

3. Make Edges Cleaner. Even when you use covering tape, getting an ideal edge at times appears to be unthinkable. Whenever you pull of the covering tape, a portion of the new paint accompanies it. Hold on until the paint dries completely and utilize a blade to cut along the edge of the tape as you pull it off.

4. Get an Even Paint Finish

Ensure you prepare divider in the wake of fixing openings and breaks with filler. On the off chance that not, the completing coats will retain into the fixes diversely that somewhere else on the divider and result in a smeared, lopsided completion.

5. Use Cotton Drop Cloths

It’s just about difficult to keep your floors liberated from paint drops. Be that as it may, a decent material or cotton drop fabric will improve than plastic sheets. Paint drops stay wet after they fall on plastic and you can follow a solitary drop overall around your home. Material drop sheets likewise stay set up better, they aren’t however dangerous as plastic and they may be more secure for stepping stools.

Mistakes That You Should Avoid

1. Following another person’s fantasy.

The aggravation of unfulfilled dreams is more extreme than that of dissatisfactions. Twenty, 30 or 40 years from now you won’t ponder that you were so disheartening to your folks for not after the profession way they decided for you however much you will lament not seeking after your own actual life interests. Help yourself out and quit living for others’ fantasies. Carry on with your own life. It is your life all things considered, right?

2. Underestimating your friends and family.

Your children will not be kids until the end of time. In the event that you detest them when they are youthful, soon they will be adults and the open door will be gone until the end of time. Your folks additionally will not live for eternity. You will be unable to excuse yourself for not telling and showing them the amount they intended to you when they are no more. Invest quality energy with everybody you love.

3. Professing to be somebody else.

Society anticipates that we should act and get things done in some ways. While it’s not difficult to capitulate to the tensions of society, don’t change so that individuals will like you. Try not to carry on with for what seems like forever claiming to be somebody you’re not simply to fit in. Act naturally. The most praiseworthy and rousing individuals in this world are their actual selves. At the point when you are yourself, you are agreeable. You draw in similar individuals who love you for what your identity is, and who will assist you with carrying on with the most satisfying life you can.

4. Cutting off the entirety of your ties.

As the familiar maxim says, be benevolent to individuals you get on your way together, on the grounds that you may require them on your way down. You might not have any desire to hear this, yet life is an excursion of ups and down. Today you may be riding the rushes of accomplishment in your own and expert life, however who can say for sure what tomorrow holds. Try not to cut off those ties in your past that assisted you with getting to where you are presently, including past companionships, organizations and connections. You may require them further down the road.

5. Lying constantly.

Certain individuals lie with such ease and promptly that is has become natural to them. What these individuals don’t understand until it is past the point of no return is that falsehoods obliterate families and connections, frequently forever. Genuine connections can’t be kept intact by lies.

How To Paint Your Home

It’s not uncommon for people to want to paint their home, but they are unsure of the best way to go about it. This article gives you some tips and tricks on painting your house inside and out.

1) Start with a good primer coat: Primer is key in any type of exterior or interior painting project because it creates a smooth surface that is easy to paint on without getting streaks or drips like you would if you were just using paint by itself. It also helps prevent mildew from forming which can be problematic when trying to get rid of old stains. Plus, many times primers have special additives such as UV protection, water repellency or anti-mildew properties which make them worth the extra cost. For best results, use high-quality primer and apply two coats.

2) Use a roller or paint brush: Many people assume that you have to buy an expensive paint sprayer to get the smoothest finish but this is not always the case. It’s totally possible for just about anyone to hand paint their home with a few different types of brushes and rollers. For smaller jobs, it might be easier to use a small foam roller. Just take your time when applying the paint so that you don’t cause any drips or runs because then you’ll need to start over again if things go awry. If you are painting walls or ceilings by yourself, definitely make sure that you follow all safety precautions like wearing protective eyewear and gloves so you don’t accidentally get paint in your eye or on your fingers. The last thing you want to do is ruin the entire project by getting a little distracted and failing to notice that you got some on yourself or another person closeby!

3) Use high-quality paint: If you don’t want cheap looking walls and ceilings, then make sure you buy high quality paint for your house. Cheaply made paints will not go on smoothly and they typically need several coats to provide complete coverage of the surface. You also run the risk of creating color inconsistencies just by using an off brand which can create big problems when trying to sell your home later down the road. For instance, if your kitchen cabinets are bright white but just about everything else in your house is bright yellow, you will probably have a problem getting top dollar for it unless you repaint everything. Not only that but inferior paints tend to look flatter and less vibrant than higher quality ones.

4) Utilize high sheen paints: The type of paint product that you ultimately choose should also be influenced by the room in which you are painting. For instance, if you want to make something like a molding stand out against other areas around it then consider using a high sheen finish paint. This can provide added depth to other items in your home like woodwork or stained countertops.